Space Bucket - Week 10

I’m posting the following journey undertaken by my friend Theodore Complete on their behalf.

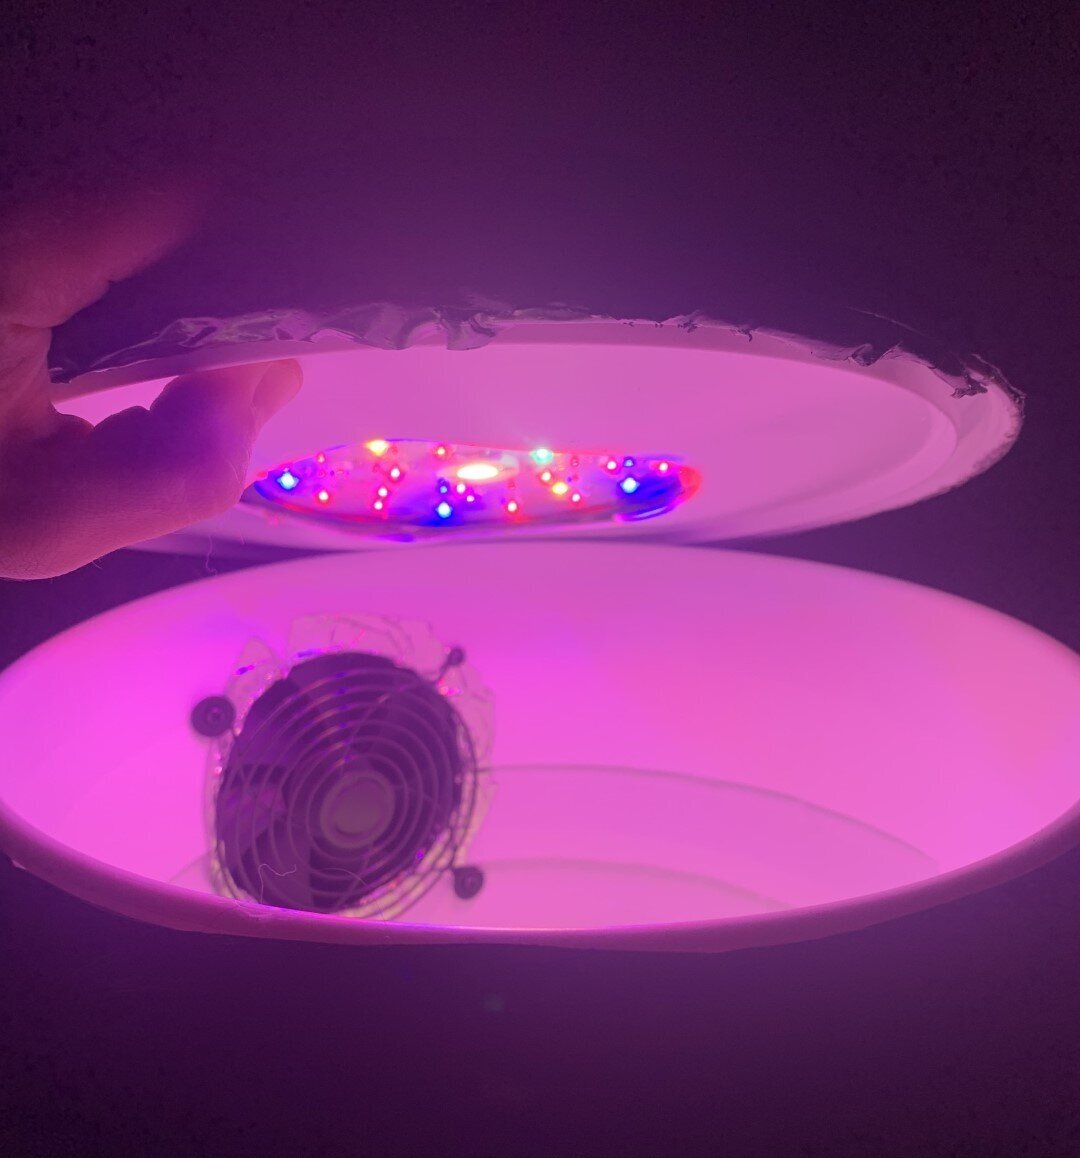
Week 10 - the Beginning of the End. Then the End.

Day 64

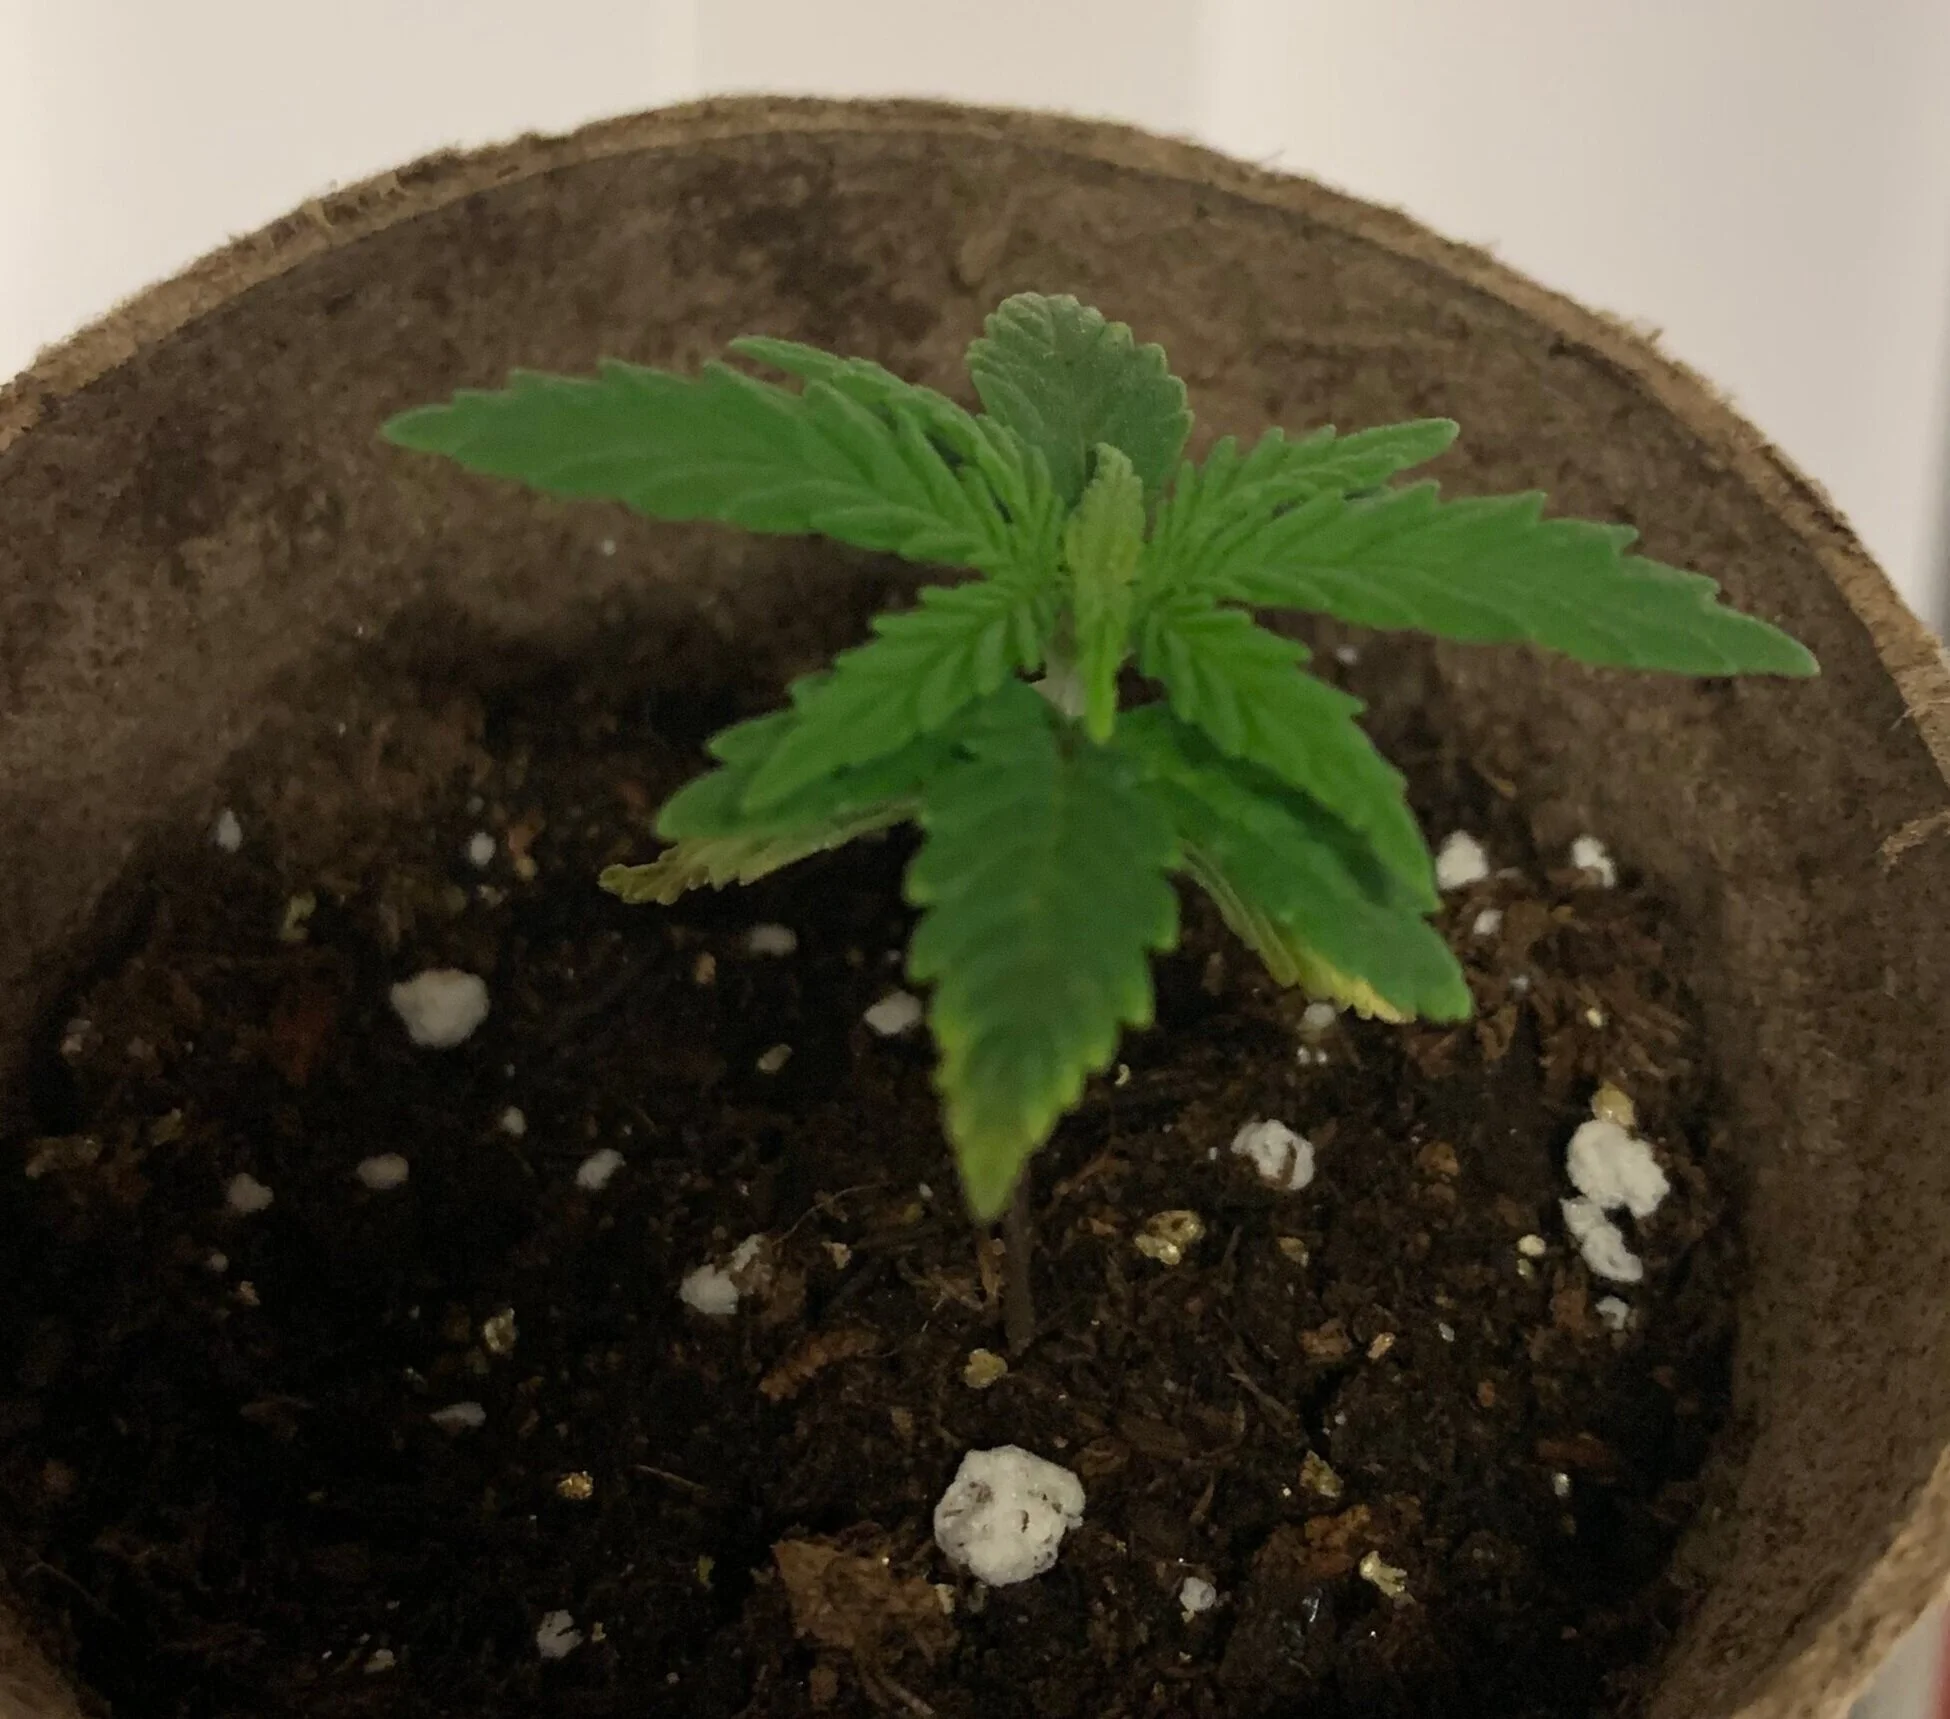
I’ve started wrapping up this first grow and started the light schedule move to flowering. I’ve learned a lot I think, especially what not to do. This ain’t going to win any awards and it may not even survive, but I plan on improving the next time. i managed to over-water, over-feed, and starve light, but the resilience of the plant really shows because it’s not dead yet. 

Day 65

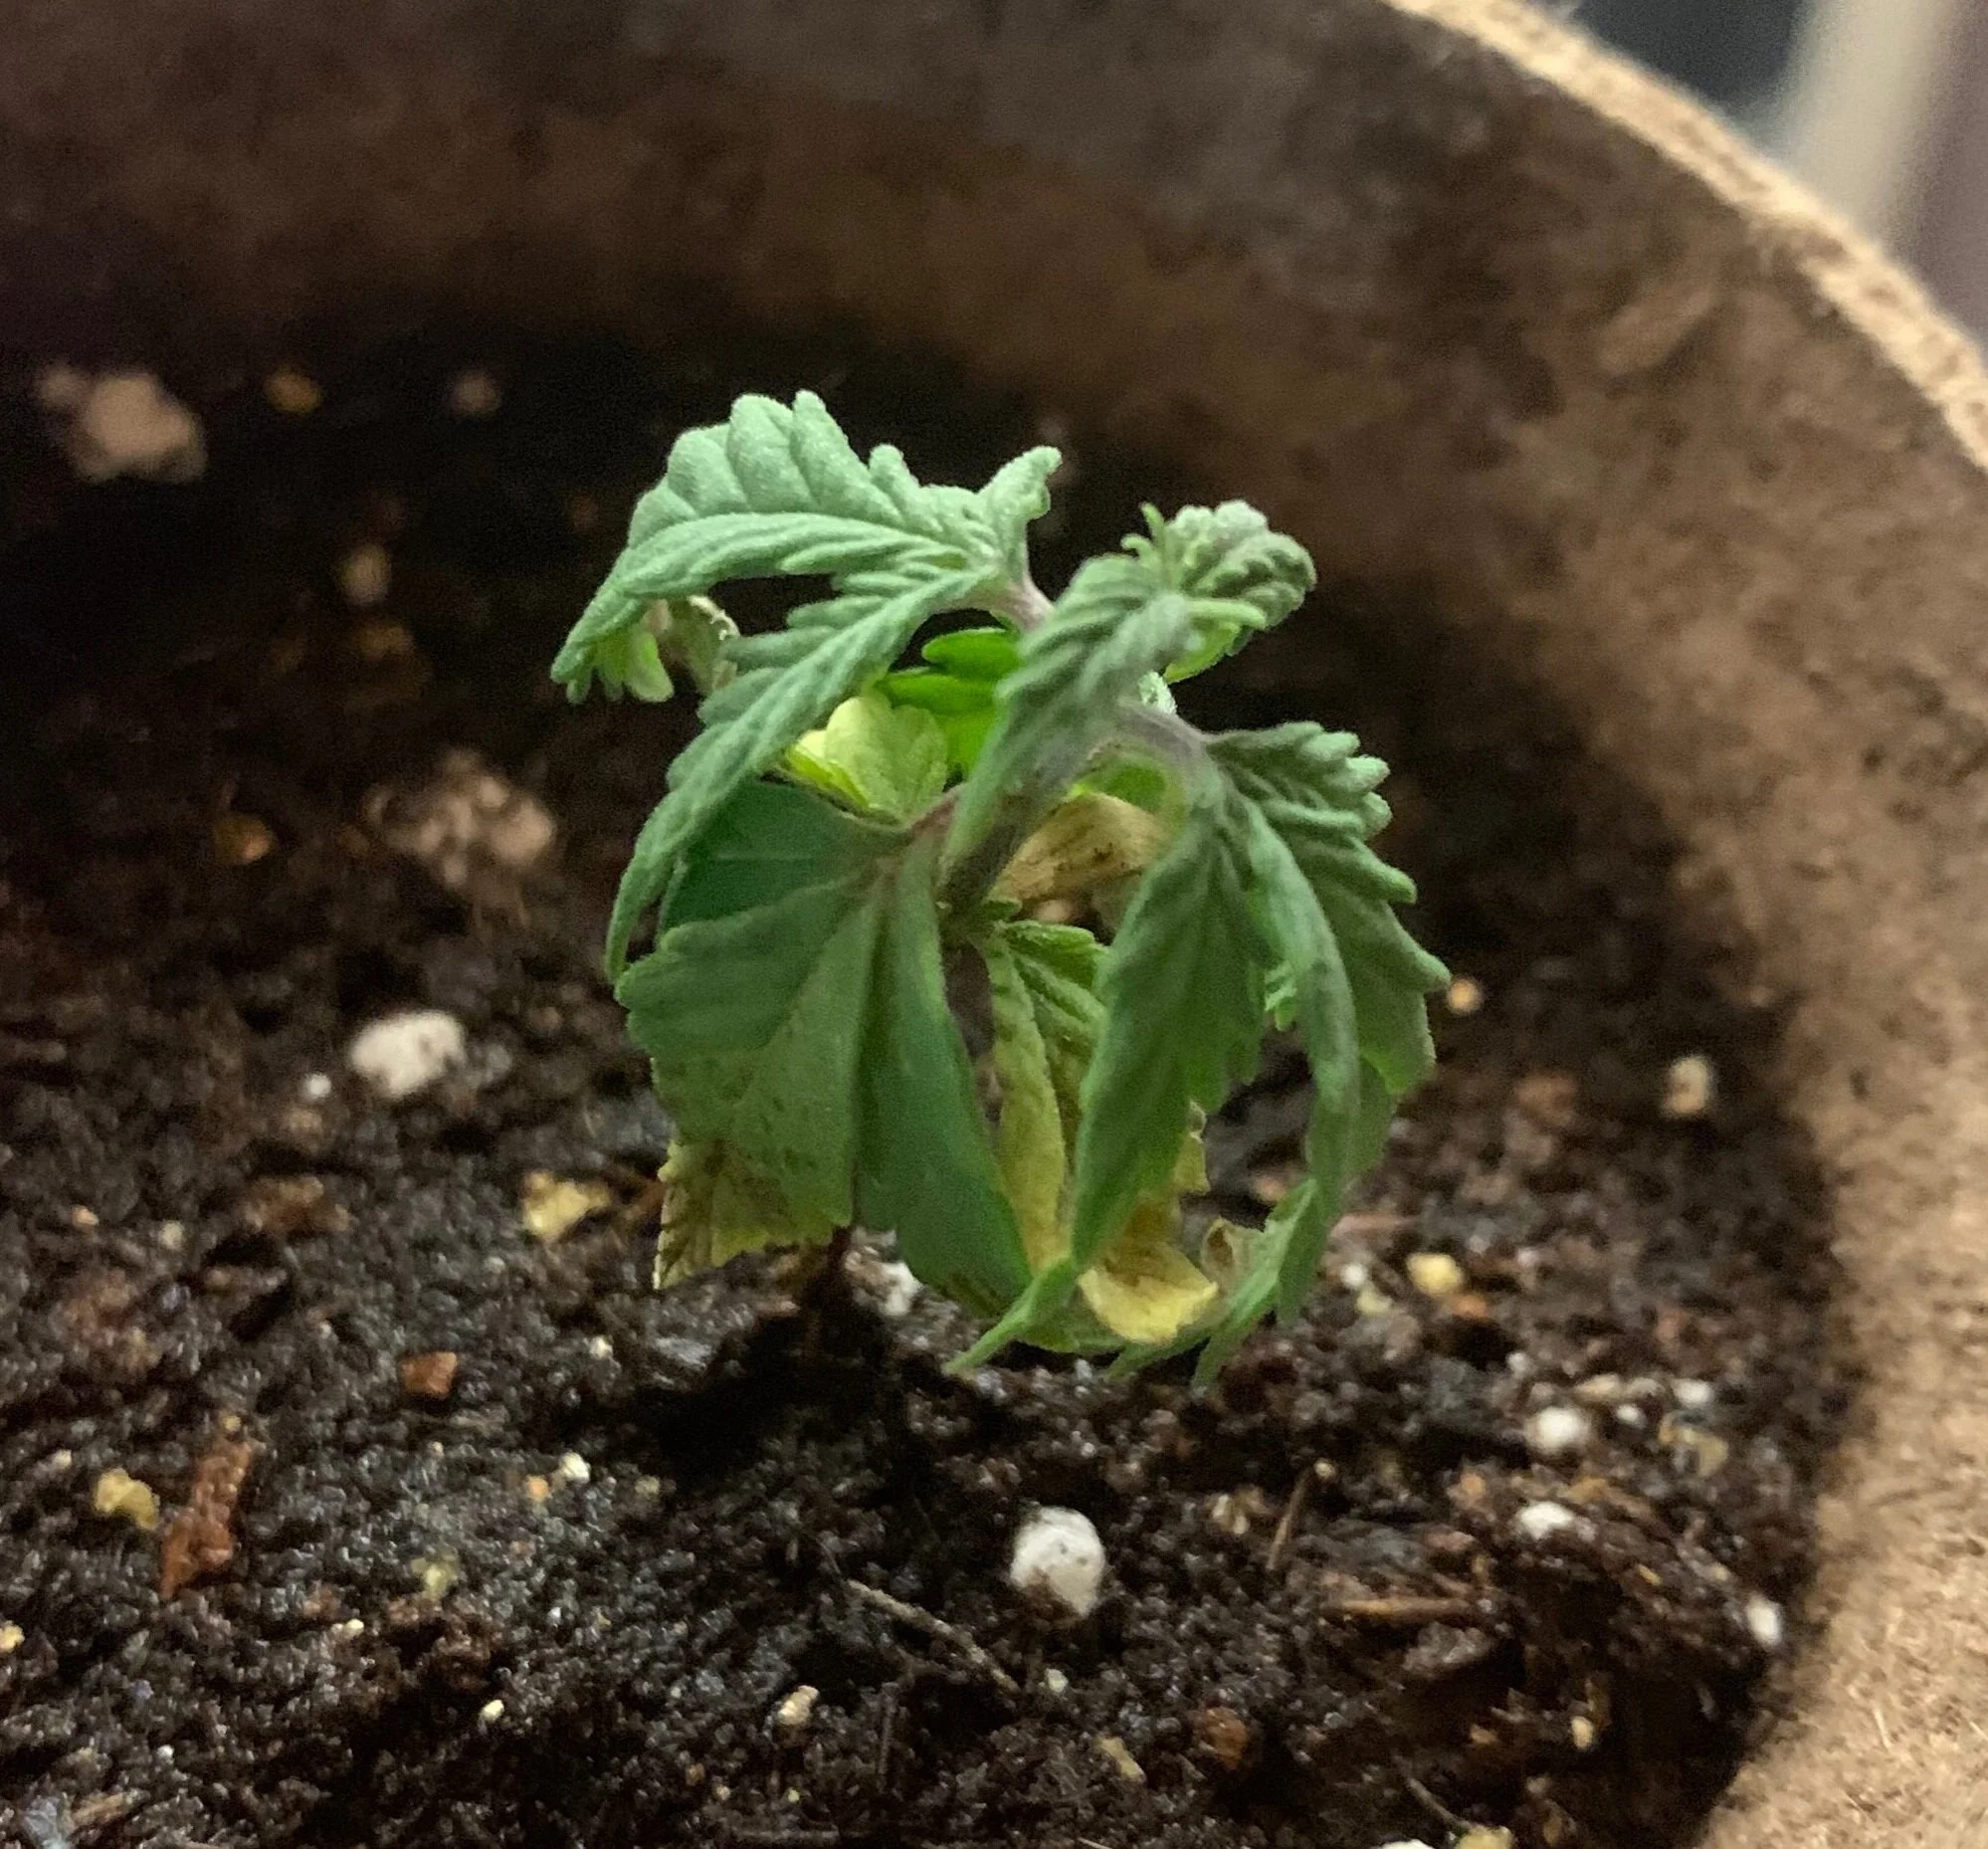
I avoided taking a photo yesterday because I’m embarrassed about what my uneducated actions have done to this once thriving plant:

IMG_1265.JPG

My dabble in space buckets is going to last just this one grow. I’ve made the decision to invest in a tent to allow me the room to do this properly... or to fail with more elbow room at least. 

Day 66

Well, hopefully I don’t just kill this with my next move. I’m going out of town for over a week tomorrow and frankly I don’t feel comfortable leaving the bucket alone in the basement. I’m throwing this bitch in the backyard and I’ll see if it lives when I come back. It’ll probably be all confused after being in 12 hrs of dark the past few days, but it’s time for it to leave the mess. 

I’m mentally preparing for my next grow anyway so I’m not going to be heartbroken if it doesn’t make it - maybe nature will heal it where I just caused it pain. 

Day 67-75

Out of town - good luck little buddy! 

Day 76

... oh dear...

IMG_1361.JPG

Space Bucket - Week 9

I’m posting the following journey undertaken by my friend Theodore Complete on their behalf.

Week 9 - The Continuing Ordeal

Day 57

After looking at grows of comparable time, the growth I’ve gotten for 9 weeks has been pretty pathetic. I’ve been resenting this blurple UFO LED but has had more to do with my unwillingness to accept that one light putting out around ~50 watts is not enough. My purchase of a lux meter has made me... see the light?? (F*ck me..). I have hopefully rectified this issue with the added lights and I’m hopeful my next grow goes better, but I’m too far in to quit this plant now. 

I gave it a good drink of straight pH’d water today- the first full watering until runoff. It looked thirsty and I thought it was time for more than small servings. I then left town all day, heading home late at the time of writing. We’ll see what tomorrow brings. I’m going to be repotting in a slightly larger container soon. 

IMG_1179.JPG

Day 58 

“One step forward, 2 steps back” is my experience with this grow. 

IMG_1181.jpg

Overnight necrosis on the top leaves. Seems like nutrient burn from my google research. Well f*ck. 

I’m just going to water in a few days and hope it pulls through. The necrosis on the leaves will either spread or not, but I’ll leave them for now. 

I’ve been discussing future plans with Tugboat regarding plant cropping - a second bucket to do staggered grows or a tent. There are moments I desperately feel I should start from scratch. 

Day 59

This plant is being a little bitch. The top leaves are seemingly worse today.

IMG_1186.jpg

I’m going away until Sunday so here’s hoping it improves. I want to let it dry out until Monday before rewatering. I fully expect to get back Sunday and be angry at this plant. 

Day 60

Away, no update. 

Day 61

I forgot to check when I got back

Day 62 

I woke up and realized with lament that I had to see what disaster awaited. The top leaves have not magically gotten better, but they’re still strong enough not to fall off at this point even with some wiggling. Hopefully they’re still providing beneficial photosynthesis. 

IMG_1213.JPG

Oh well, keep on trucking I guess. I’m going to continue to flush with just water and let nature take its course. 

I decided to repot in an attempt to both center it a bit and give it a bit more real estate. Plus this one has handles and that is convenient for me. Last time I repotted it had a good blast of growth so we’ll see what happens. 

IMG_1214.JPG

If I don’t see any more developmental changes in the next week I think I’ll switch it to the light schedule that triggers the flowering phase. 

Day 63

Ugh. 

IMG_1241.JPG

Space Bucket - Week 8

I’m posting the following journey undertaken by my friend Theodore Complete on their behalf.

Week 8 - Training

Day 50

When plants grow beyond seedling they can be super resilient, and that resiliency is useful in training because you can basically make them bend and form to whatever shape you want. I’ve never trained cannabis but I’ve trained various other plants and shrubs, and the principle is the same - bend them or pull them just enough not to break the stem and it will conform to growing in that direction. The reason this is done in cannabis is to force growth more horizontally which creates more growth sites in the flowering phase. 

I may have waited too long to do this on this grow but it’s worth a shot. After I topped and bent it yesterday I took a look and it seems like its making the best of the new situation.

IMG_1116.jpg

I’m curious to see how this reacts to the stress, and it will likely need a few more days of growth before further adjustments. I think I would be more cavalier with the training if I had more than one plant to work with. 

Day 51

I trimmed some of the growth that was blocked by shade and tied it a bit more. I didn’t take a photo because I forgot to take my camera into the basement and didn’t bother going back. 

Day 52

So here’s what this looks like at the moment:

IMG_1123.JPG

Seems to be alright, I gave it a drink and let it relax into the new position. 

Day 53

Just took a photo and otherwise ignored it. I may need to repot it to center the mass, but I’m not going to rush at this point. 

IMG_1135.jpg

Day 54

I trimmed and tied down more - I’m going to repot in a few days to center the plant more. I’m not sure if the level of defoliation is too much but it felt right, now I’ll let it try to grow into the contorted mess I left it. It’s taking more water now too and I’ve been increasing the frequency. 

IMG_1140.jpg
IMG_1147.jpg

Day 55

When I check this morning I found the plant praying to the sun gods. 

IMG_1158.JPG

My light levels may be falling behind the demand curve. I can’t have it lacking for photons, so after a quick trip to the hardware store and some wiring I added a new ring 

IMG_1157.JPG

I mixed LED bulbs I had at home already I found 4 x 5000 k ‘cool white’ bulbs, 2 pulling 15 watts, 1 x pulling 10 watts, and 1 x pulling 8 watt, so a 48 W addition to the ~60 watt UFO. These aren’t directed right at the plant, but the ~20000 lux reading at the canopy doubled from the addition. I’ll have to see how it responds and how the heat levels are affected. Some of the blue and red led light is blocked but the powerful center led is still going. I may swap warmer spectrum lights when it’s in flower since I have some led bulbs laying around. 

IMG_1162.JPG

Day 56

All seems well. I saw a bit of a temp climb so I’ve just opted to leave the fans on low full time with the light. I sprayed a bit of nutrient juice but then really looked at the bottom leaves.. they’re pretty deep green, which may mean too much nitrogen. I’ll just give it water without nutrients for a week or so to see if that changes things. I’m really going to keep an eye on what blasting all this extra light will do.  

I remember my high school chemistry teacher used to chastise me for this sort of reckless variable management. Some things never change I guess. 

Updated cost list below - I didn’t count stuff I already had like pieces of wire, bulbs, etc. Basically added another bucket and the sockets. 

IMG_1168.jpg
IMG_1170.JPG

Space Bucket - Week 7

I’m posting the following journey undertaken by my friend Theodore Complete on their behalf.

Week 7 - A New Hope

*note - there are a few days where I got busy with life and ignored this other than a quick peek here and there

Day 43 

I’ve had some highs and lows trying to figure this out, but now that I have what I feel are the proper tools to make good feeding choices the plant seems to be of improved health. I gave it a drink and left it alone. 

unnamed (1).jpg

Here's an updates cost listing at this point. I don't anticipate any more expenditures other than maybe some fiddly bits to eventually attach the carbon filter but I can't imagine that having a drastic impact.

Image 1.jpg

The biggest expense was the filter and seeds, without which I would be around $400 which isn't bad I guess. I’m still not confident in the grow light and wish I had spent a bit more on it.   The seed cost irks me but I guess I'll blame the pandemic and my own impatience and move on. I have enough seeds for quite a few more grows at least, but there would be future crop input costs for those like soil and nutrients. 

Day 44

Maybe I should start referring to ‘after sprout’ days - in which case I’m at 39. That would probably confuse things at this point. Nothing to report today, seems healthy. 

I’ve been reading about low stress training and may do that after it grows a bit more. 

unnamed+%281%29.jpg

Day 45

Seems alright, gave it a drink. 

Day 46

I did nothing, kinda forgot about it. 

Day 47

Another null report, I don’t even think I looked inside. 

Day 48

This plant is getting bushy. I gave it a drink then started pondering topping and LST techniques. 

Day 49

Looking just fine this week. I feel ask though growth has really exploded since I adjusted pH levels - lesson learned for the future. 

I managed to get a glamour shot:

IMG_1106.JPG

I’m sure I could cram a larger pot inside the pail but I’m more interested with getting through to my first harvest with this plant. 

I made the decision to end the week with a dive into low stress training and bend this thing to my will. I topped it, trimmed the lowest leaves, and tied it down. 

IMG_1104.jpg

Let’s see what the next week brings!

Space Bucket - Week 6

I’m posting the following journey undertaken by my friend Theodore Complete on their behalf.

Week 6 - Ennui

Day 36

I know I need to ride this out to completion, but I don’t feel like I’m doing well at this at all. 

I have a lot of self-criticism about my set up at this point based on reading the experience of others: the growth is too stunted, it’s too cold in the basement to grow properly, the UFO light is junk, I’m not feeding the proper nutrients, I don’t have the right tools.. a lot of frustration and self doubt. I see pictures of grows from other people and they seems to be leaps and bounds beyond me at this phase. 

I guess that, like all new hobbies, humility is the price of admission. Still, I assumed I’d be able to do better than this, but the mistakes I have made  in gathering tools piecemeal through the grow should help make the second one go smoother. Part of me wants to start right from scratch, but I also know I’m crusty from a shitty nights sleep. 

My light is still set to the same distance, seems to be pumping out roughly 12000 lux with the added height of the new pot. 

IMG_0886.jpg
IMG_0887.PNG
IMG_0888.PNG

Day 37

No change from yesterday. I’m telling myself it’s getting used to the new environment. No water today. Apparently my pH pen and additional nutrient help will arrive early next week. 

Day 38

IMG_0968.jpg

Now I’m thinking nutrient burn, so I’ll just water it without for a little while. It just doesn’t want to grow upward though. Hopefully the cal-mag will help this since it could be a symptom of calcium deficiency. 

I moved the LED strip ring to the highest position and turned it on for the day to see what it does to temps. This puts the LUX reading at about 21000 at canopy height.  

Gave it a few tbsp of water at the base. In anticipation of getting that pH pen I’m going to grab a bottle of pH up and down from the hardware store - $12 each. Given the size of this operation these should all last a long time. 

It has been really muggy lately and I turned on the portable dehumidifier I have out of curiosity.  It’s reading 72% RH in the room as opposed to the 63 in the bucket. I set it to 60% for the room and let it run for the morning. By noon the ambient humidity was 58 and 56 inside the bucket. 

Day 39

I bought some pH down ($8) and used the pH test kit I already had that relies on colour - I’m never confident in my own colour matching abilities, but I did get a colour more in the 6 pH range after adding quite a few drops to the water jug. I gave it a tiny misting at the base. 

Looked happy a while later

IMG_0987.jpg
IMG_0988.jpg

Day 40

Seems pretty content so I left it alone. The heat is creeping up with all the lights on so I set the fans on a timer to turn on/off every half hour which seems to keep it fairly regulated. 

Day 41

I feel like maybe this little sucker is doing alright. Growth seems to have picked up a bit, and I’m not sure whether to attribute it to the new pot, the light, the temp, or the pH’d water - I’m going to choose the water though considering the high pH it is naturally. I wish I had pH adjusted the water ages ago. Lesson learned!

IMG_1008.jpg

My pH pen and cal mag came in today. I calibrated the pen and retested the water I had previously pH adjusted - it read 6.3 which is about in line with what the colour strips suggested. 

I put a spray bottle of vitamin water together with cal-mag and nutrients (low dose) with water and adjusted the pH until it read 6.1 and gave the base a little spritz. 

Maybe I’m once again running before I walk, but screw it, sometimes life is about rolling the dice. 

Day 42

Well, another week down! I think the adjustments to the water pH have helped and it looks happy. 

Temps for the week seemed fine, humidity too a weird dip that could be an error maybe. All in all, not a bad week considering it started crummy. The plant is starting to smell a bit too. 

IMG_1018.jpg
IMG_1019.PNG
IMG_1020.PNG

Space Bucket - Week 5

I’m posting the following journey undertaken by my friend Theodore Complete on their behalf.

Week 5

Day 29 

I’m pretty sure I got drunk and forgot to check on the plant today. Happy Canada Day!

Day 30

Seems alright to leave alone today. It was pointed out that I didn’t follow up on the temp change from the 27th. Turning on the side LED lights pushed it to around 25C which is where I think I want it during this phase of growth. My growing area stays around 16-18 C in summer due to my house HVAC layout, and when I spent some time trying the fans it dropped the temp inside the bucket quickly so I decided to leave the air intake passive aside from the fan on the light until it grows a bit more. 

IMG_0839.PNG
IMG_0830.jpg

Day 31

Ignored it today

Day 32

It’s starting to look nice. I’ve been pondering when the appropriate time to re-pot is. There are some brown spots on the lower fan leaves I’ll be looking into. 

IMG_0838.jpg

8:05 pm - Well goddamnit what the hell?!

IMG_0840.jpg

I’m banking on this being a higher need for water based on increased light and heat - the photo was after I added water so I’ll see if that helps. I kinda panicked and probably added too much. I turned off the side LED and left just the overhead light. I’m starting to resent this plant. 

Day 33

You little piece of shit.. it came back a bit overnight but it looks savaged. Here’s hoping they’re as tenacious as the name ‘weed’ implies. 

IMG_0845.jpg

Day 34

This little prick seems to live in extremes. I think I need to order some calcium supplementation based on what the internet has told me.  I ordered some cal-mag and a ph pen from Amazon today as well, $25 each roughly. 

IMG_0859.jpg

Day 35

I decided to repot today.  I’ve repotted other non-cannabis plants at this growth stage without issue but this may be another ‘wtf’ learning moment. We’ll see how this goes.  

I found a felt pot at the local hardware store and some ‘hydro potting mix’. The pot fills the bucket nicely, and the felt is supposed to aid aeration of the soil. I think this will be it’s final home based on size. 

I gave it some water and left it to get used to the new digs. See you tomorrow you little bastard. 

IMG_0866.jpg
IMG_0864.jpg
IMG_0865.jpg

Space Bucket - Week 4

I’m posting the following journey undertaken by my friend Theodore Complete on their behalf.

Week 4 - Grow, damn you

Day 22

I’m feeling good about this week, I don’t know why but I feel like this is gonna take off.  Come on you little bastard!

IMG_0783.jpg

Day 23

I think it’s looking good but it also looks weird right now. The bottom fan leaves don’t look great but it seems to be pushing some vegetative growth so I’ll see what plays out over the week. 

IMG_0786.jpg

Day 24

I watered but I flinched and added too much. I took a picture later to show how it gets all droopy. I’ll probably not water until Tuesday or Wednesday now. 

IMG_0794.jpg

Day 25

Did nothing but take a photo. Going to be a few days of this. 

IMG_0798.jpg

Day 26 

It’s looking bushy and happy. I’ll water it tomorrow. 

IMG_0805.jpg

Day 27 

I skipped the watering and decided to try upping the light at this point. Seems healthy enough at this point to take some stress - I turned on the LED strip lights and the fans. The lux meter reads around 10k up from 7500. If all goes well I’ll push to 15000. I’ll see tomorrow how the temps trend and check up tomorrow. 

IMG_0817.jpg

Day 28

Droopy and dramatic. I gave it a drink and it perked up in about 20 minutes. 

IMG_0824.jpg
IMG_0825.jpg

Space Bucket - Week 3

I’m posting the following journey undertaken by my friend Theodore Complete on their behalf.

My struggle not to kill it

Day 15 

Looks like the little bugger is growing the next set of fan leaves - no idea if that’s the proper nomenclature or not. Hopefully it outgrows the damage I did to it last week. I’m finding space bucket growing challenging, but I signed up for this so I need to work through it. 

IMG_0704.jpg

Day 16

It still looks sad today. I feel like an awful parent. 

IMG_0706.jpg

Scouring growing forums has led me to believe it’s a nutrient deficiency, and once I reviewed the bag of growing medium it looks far more inert than I originally assumed so it may be possible it is done burning it’s internal stockpile. All the nonsense I put it through likely didn’t help any either, but I still think I can bring it back.  

I picked up some nutrients from Canadian Tire totalling $30. 

IMG_0708.jpg

Fun fact - apparently Root Farm is owned by Hawthorne Gardening Company, a subsidiary of Scott's Miracle-Grow, which was created for cannabis growers.  Because it’s 2020 I can grab it at the hardware store along with a new nozzle for the garden hose. I mixed / diluted per label directions and watered with around 2 - 3 tbsp of the mix. Stay tuned. 

Day 17

I can’t tell if there has been any change so I’ll leave it until tomorrow. 

Day 18

I feel like it’s more lively. I gave it another 2-3 tablespoons of nutrient water. 

IMG_0736.jpg

Day 19

Looking livelier - hard to tell from the photo but it looks greener. No water today. 

IMG_0744.jpg

Day 20

Gave it a little drink - it’s looking good. Amazing to see the difference from the start of the week until now. 

IMG_0755.jpg

Day 21

It’s really starting to pop out leaves now. 

IMG_0767.jpg

I’ve only been using the nutrients a few days and feel like they have been well worth the minor investment. 

Today another investment arrived - a cheap lux meter to measure light intensity.

IMG_0774.jpg

A quick check confirmed I’m wayyyyy to close to the light with the seedling so I dropped it down to the bottom of the bucket. It probably explains the yellowing as light saturation damage...? We’ll have to wait and see. 

Space Bucket - Week 2

I’m posting the following journey undertaken by my friend Theodore Complete on their behalf.

Growing the Youngling

Day 8

The soil was dry up to the depth of my first knuckle so I saturated the top with a spray bottle. Maybe every 2 days is the sweet spot for watering. 

I’m comfortable with the ability of the bucket to regulate temperatures and humidity in a fairly controlled spread, and I continue to use a little dome over the seedling to ensure higher humidity ranges until it starts to grow a bit more. There are variabilities to the temp/humidity data I’ve tracked that can mostly be attributed to me messing around, but nothing that I would consider a detrimental spike. As long as I’m keeping it between 20-30 C daytime and dipping at night I think it simulates outdoor conditions fairly well. There’s a weird phenomenon that causes a daily temp dip around noon by a few degrees that makes the  temperature graph remind me of an EKG readout. I don’t know the cause but I’m also not losing any sleep over it - It makes me feel like I’m watching the heartbeat of the plant. 

It’s too early in the game to use the LED side lights - there simply aren’t enough leaves to absorb all the extra photons. 

The growth evident in the fan leaves is promising, and unless I start to observe any major changes I plan to leave it be for the most part. 

IMG_0627.jpg
IMG_0628.PNG
IMG_0629.PNG

Day 9

IMG_0641.jpg

Day 10

Gave it a drink and left it alone until 5pm, decided to start getting it a bit tougher and turned on the side lights and fans on low for a few hours before it sleeps for the night. 

Day 11

I read a review on the style of LED from reddit user SuperAngryGuy that suggested an optimal plant distance of 8 inches to cram every photon into the plant. Judging by his post history full of thorough lighting reviews I felt confident his knowledge base is better than mine by a few orders of magnitude. 

I swapped the upper fan ring with the LED sidelight ring and propped the plant further Up using a paint can to within 8 inches. I also left the LED lights on because I grew up watching Home Improvement and Tim Taylor bellowing “MORE POWER” is forever in my heart. 

IMG_0651.jpg

Day 12

Let it be. I noticed a dip in temps and realized I left the probe out of the bucket. Whoops. 

Day 13

Went to water it in the morning and noticed the leaves look wilted.  This happened after I made the environmental changes 3 days ago and it feels like I made backward progress compared to photos at the start of the week. Damn you Tim Taylor. I rolled back the changes made this week - dialled back the light to just the LED, moved the plant further away, moved the warming mat back in, and put the humidity dome on. The negatives took a few days so I’m hoping I’ll see improvement in a few days as well. 

Also, True North Seed Bank mysteriously credited my May 2 order and then entered a new identical order for me and sent me a receipt of payment for this new order. Maybe I’ll be inundated with seeds soon. 

IMG_0687.jpg

Day 14

I was a bit disheartened yesterday realizing I did some dumb stuff before the plant was ready and had caused it some damage. The Tugboat suggested I try to emotionally distance myself, so I’m going to try that. I’ll let it go a few days at status quo as before and hope it regains the vibrancy it showed before I started mucking around. Stay tuned. 

IMG_0698.jpg

Space Bucket - Day 3-7

I’m posting the following journey undertaken by my friend Theodore Complete on their behalf.

Day 3

I abandoned the camera idea. It died overnight because the power supply is on a timer and I’m not willing to put any more time into it at this point. The aphorism ‘watching grass grow’ comes to mind. I’ve seen some time lapse photography of plants growing that looks cool, but I don’t have the proper setup for that. I’ll take photos from here on in if they’re worth taking. 

Day 4

I added some water but otherwise ignored it to let nature take its course. I’m just using tap water  during this grow as a baseline. 

Day 5

I checked out the bucket this morning and found a new friend poking up. 

IMG_0589.jpg

Hi little buddy, welcome to the world!

I smiled and replaced the plastic wrap over the top to keep humidity up and left it alone to work on getting strong. 

I recorded these in the evening:

IMG_0596.PNG
IMG_0595.PNG

I read that the optimal humidity range for seedlings is 60-70% so I am going to rig up a spare humidifier tomorrow. 

I replaced the plastic bag with a domed piece of plastic that won’t touch the seedling, and gave it a spritz or water - I’ll find out tomorrow morning how well the dome keeps the humidity in. 

Day 6

I will be moving to water every 2nd day. I placed a heating pad inside to raise temp. This won’t be an issue when the LED ring is fired up but I’m hesitant to blast it with so much light at this point. 

I got a heating pad for a reptile tank and put that in to regulate, temps trended up. 

IMG_0602.jpg

Day 7

I’m ignoring the little bugger today other than a progress pic. The soil is quite damp and I may push to water every 3 days rather than 4.  Will re-evaluate tomorrow. 

Space Bucket - Day 2

I’m posting the following journey undertaken by my friend Theodore Complete on their behalf.

Day 2

A few weeks ago on a whim I had decided that I wanted to upgrade the functionality of my hygrometer to allow for remote viewing so that I’m not constantly walking down to check on it.  I found a wifi model with an app on Amazon for $40. Seemed ok so I pulled the trigger and lo and behold it arrived yesterday. Or so I thought. 

unnamed.jpg

I emailed the vendor to inform them and the response, though not rude, assured me that ‘we do not sell face masks’. Well that’s a great, but you sent me some. I followed up with photos and am mentally preparing to start a lengthy email fracas over this. 

I don’t believe I’ve experienced as many issues with shipped products in such a short timespan as I have over this project, so that will be memorable. 

As the day wore on I peered inside a few times like a helicopter parent and realized the temp probe wasn’t on the pot properly. Turns out the temp was a balmy 39 degrees. Whoops, didn’t want to cook them. 

At this point I decided I best move the whole thing down into the basement so that temp adjustments would give me more usable info at the final location. My bucket will live in a basement closet with a few pieces of insulation to help maintain a steady state. It’s a bit wonky looking but I’m not going for style points.

unnamed (1).jpg

Conveniently there is a plug in this closet for whatever reason, so it accommodates this project nicely and there is room to set up the carbon filter later on.  I installed a GFCI plug in this space for the grow to enhance safety, and I’m sure will confuse future owners of this home. It is also the first leg of the whole circuit in the room so if it trips the lights will not work - another delightful Easter Egg that has the potential to confuse and infuriate people in the future if it ever resets, possibly causing them to call an electrician too. It’s great. 

UPDATE 

The wireless sensor arrived in a second package with no packing slip today. Bizarre, but oh well now I have 2 free masks which I will wash before using. I’m now wireless and I sent an email to the vendor to confirm I received it. I may never know why the packing slip came in a different package along with some masks. I can only hope it doesn’t haunt me. 

unnamed (2).jpg

I also rigged up an old phone using an app called Alfred to get a video feed. 

unnamed (4).jpg

It’s not great quality but may help me document, or I will abandon it of frustration. I wasn't doing anything with the phone anyway. 

Stay tuned. 

Space Bucket - Day 1

I’m posting the following journey undertaken by my friend Theodore Complete on their behalf.

Day 1

Today is the DAAYYYYY!

I had been frustrated about the delay in receiving my seeds and genuinely wondering if I was going to have to sink more cost into finding replacements. However, the seeds arrived! And as an added bonus, they threw an additional 5 seeds in there!

713f29aa3a54333f396b0afb2d82594c.jpeg

Not much to look at I guess, but they were quite the ordeal to get. Of the 3 strains I received, I chose Cinderella C99 (https://www.leafly.ca/strains/cinderella-99).

After literally weeks of considering different germination methods, soils, and pots sizes, and after procuring a special grow kit from Jiffy Pot, I got excited and just grabbed some starter mix and perlite I had lying around from starting my beans and threw some into a peat pot. My intention is to simply cut slits into the peat pot and plunk it into a larger container when the time is right. Maybe I'll use those jiffy starters for herbs or something, I dunno.

070aebf603a0e95cb3250f00912cc5be.jpeg

I read that seeds like warmth to germinate and I noted the LED ring inside the bucket gave off a good amount, so that should work right? I read that the roots are UV sensitive but figured the pot will block it out.  I gave it a good drink of water and covered with plastic wrap to try to mimic a little greenhouse and put it inside.

I adjusted the wall timer to 18hrs on, 6 off. I will continue this light pattern until the plant is switched to flower, setting at 12/12.

5f3edf855885cbb3feb78c5f0bef689b.jpeg

Space Bucket - Day 0

I’m posting the following journey undertaken by my friend Theodore Complete on their behalf.

IMG_0509.JPG

Spacebuckets: the mini-mini grow op

I enjoy planting and gardening as a hobby, and I was curious about growing cannabis after legalization. Many friends of mine tried growing in their backyard just for the novelty of the whole thing after it was no longer a crime, but I had no desire to have one in my backyard. I'm sure a bit of the old stigma played into my decision, but I was always struck by how much they smelled when they were in their flowering stage. In addition to that, growing any plant outdoors has a slew of environmental issues that you can only mitigate to a certain point, and if i were to grow I wanted to try and produce the best quality I could. I decided at a certain point that were I to grow, it would be in a more discreet and controlled indoor manner. I had never really gone beyond these theoretical consideration until I came across a forum on spacebuckets. In no time at all I became fascinated with this microgrow method and found myself planning my own bucket in no time.

You're bringing a plant from seed to harvest inside a relatively self-contained and discreet growing area. Indoor growing is not new and neither is this, but in this case the growing area is a small bucket or pail that contains the plant and grow lights inside. The pot plant size has to be kept relatively small and average yields seem to be in the 30 gram range, and if you were to buy you would be looking at anywhere from $150 to $190 from the government.

There is a wealth of information available online on how best to set up a spacebucket and how to grow weed, but you can really 'go down the rabbit hole' with optimal nutritional supplementation and growth training to maximize yields.

Planning

There are loads and loads of potential designs for self contained growing operations to suit your preference. I wanted to try out the standard bucket design.

My goal was to have several sections that I could jockey around to suit the growth height.

  • Lid - houses the main grow light

  • Top Vent section - houses 120 mm exhaust and eventually the carbon filter when the growth stage warrants attachment

  • Middle Light Ring - houses white LEDs for supplemental lighting where there is shading from leaves

  • Base / intake - will hold the plant, has drainage holes drilled into bottom

  • Drip tray

I scoured various sites found in posts on popular growing forums to try to get this happening. Here's how the build priced out.

Financials.jpg

As you can see, the most costly item is the filtration system. I thought about this for quite some time before pulling the trigger, but I knew from having been around flowering cannabis plants before that the smell could potentially become overwhelming. This would kill the discretion I'm looking for so I decided on it.

Building

I used a rotary dremel tool / drill / utility knife to cut the appropriate holes in the buckets for the fans and light. The black tape blocks light from escaping since the lights inside turn the whole thing into a lantern. I pre-wrapped all buckets with black duct tape first so that I could avoid dealing with that part later.

The build is pretty straightforward.  I decided for a modular design in order to use portions like the LED ring at my discretion after the plant growth warrants it. All in all the construction went well, and I think my setup looks pretty slick.

IMG_0508.jpg
IMG_0509.JPG
IMG_0507.JPG

Seeds

I wasn't satisfied with the availability of strains from official vendors, so I decided to go off the grid a bit. This had mixed results.

Again relying on the suggestions of the online community, I made my way to a well recommended vendor and placed an order for 4 seeds for $41. Within a day my money was accepted and then the wait begain!

Unfortunately at the time of writing the wait is still ongoing. Several followup emails yielded no responses after several weeks passed without a shipping confirmation. Granted they have a disclaimer citing Covid-19 related issues, but I can't imagine wanting to deal with an outfit that doesn't respond to inquiries. By all accounts I was ripped off. The company is Jordan of the Islands. Don't deal with them, fuck those guys.

I placed a second order from a different outfit. This one had a minimum order size, so the price there ended up being $120. 

This is turning into an expensive experiment..

So now I've built my bucket and now I play the waiting game. Stay tuned for more, but in the meantime our little pepper plant is loving this.

IMG_0511.JPG